Category: Sewing

  • Bronwyn’s Handmade Christmas November 2018: Stress Balls

    Bronwyn’s Handmade Christmas November 2018: Stress Balls

    What’s your stress level this time of year? Does someone on your gift list need to chill out? This might be the handmade gift for both of you.

    Sensory toys have become increasingly popular over the past few years. Stress balls and squishies are suddenly current and cool. What used to be a sort of gag gift is now a welcomed desk accessory. Go figure.

    Last spring, a teacher asked me to make stress balls for her class to help them while taking standardized tests. I had crocheted a stress ball for her the year before because I knew she had a few particularly troublesome students. She asked if I could make one like it for each of her 26 students. The problem was that she didn’t think of asking until the week before testing and there simply wasn’t enough time for me to make them. 

    Crocheted stress balls
    Crocheted stress balls made from the Ideal Sphere pattern.
    I made them reversible–happy on one side, angry on the other.

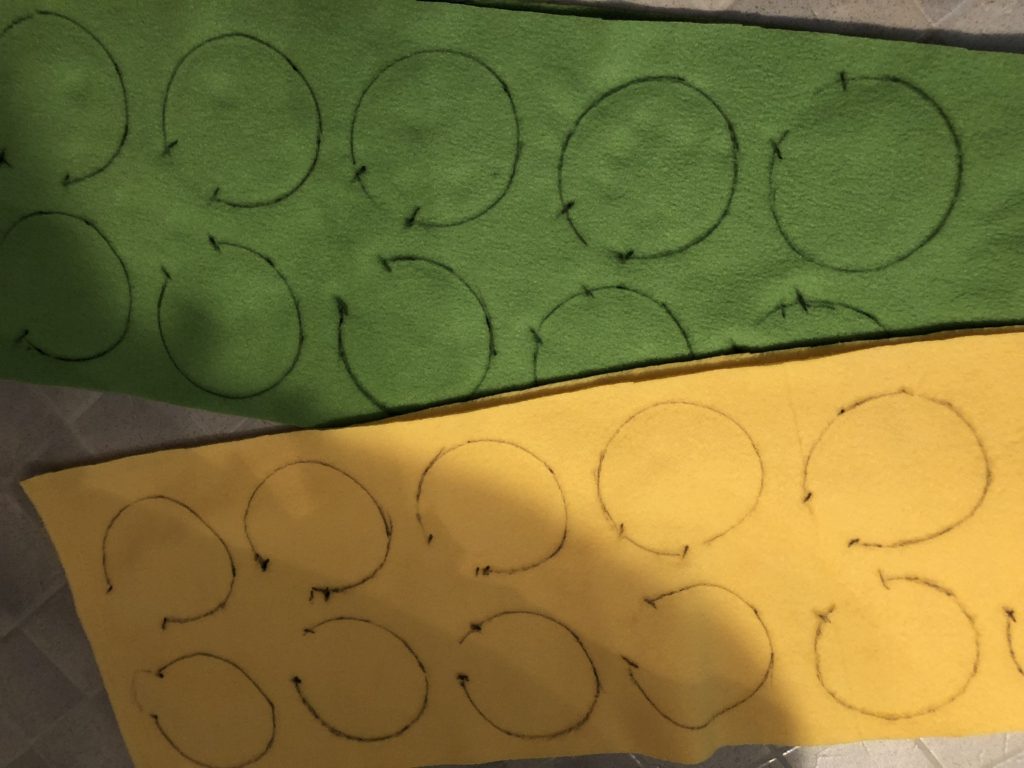
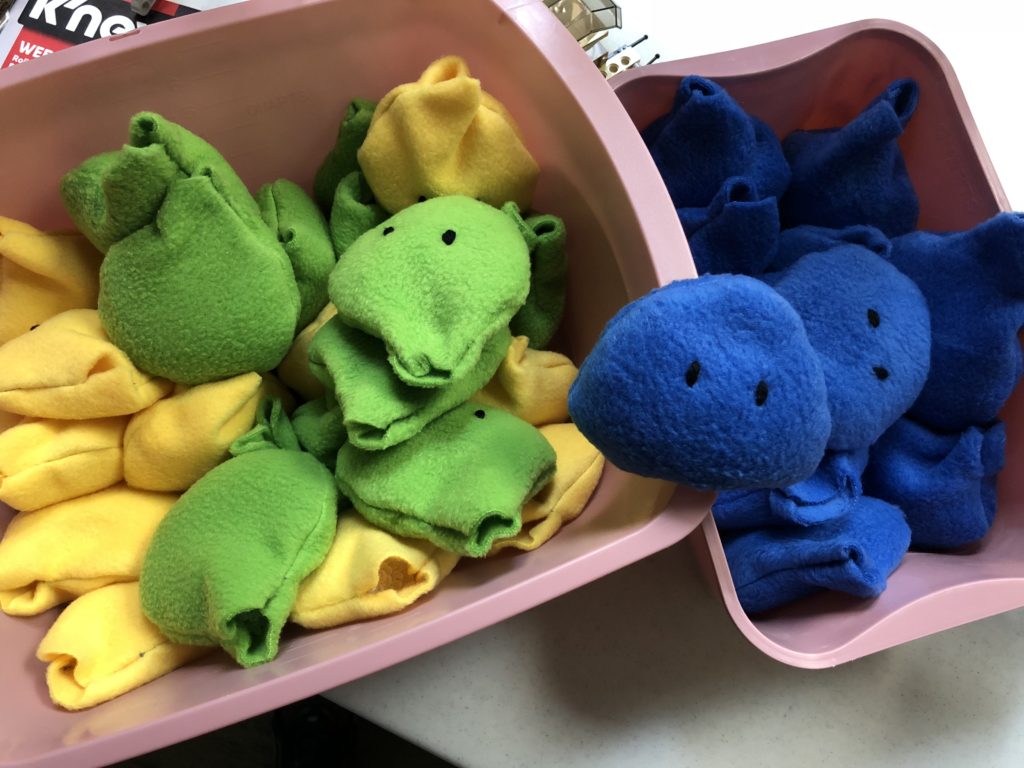
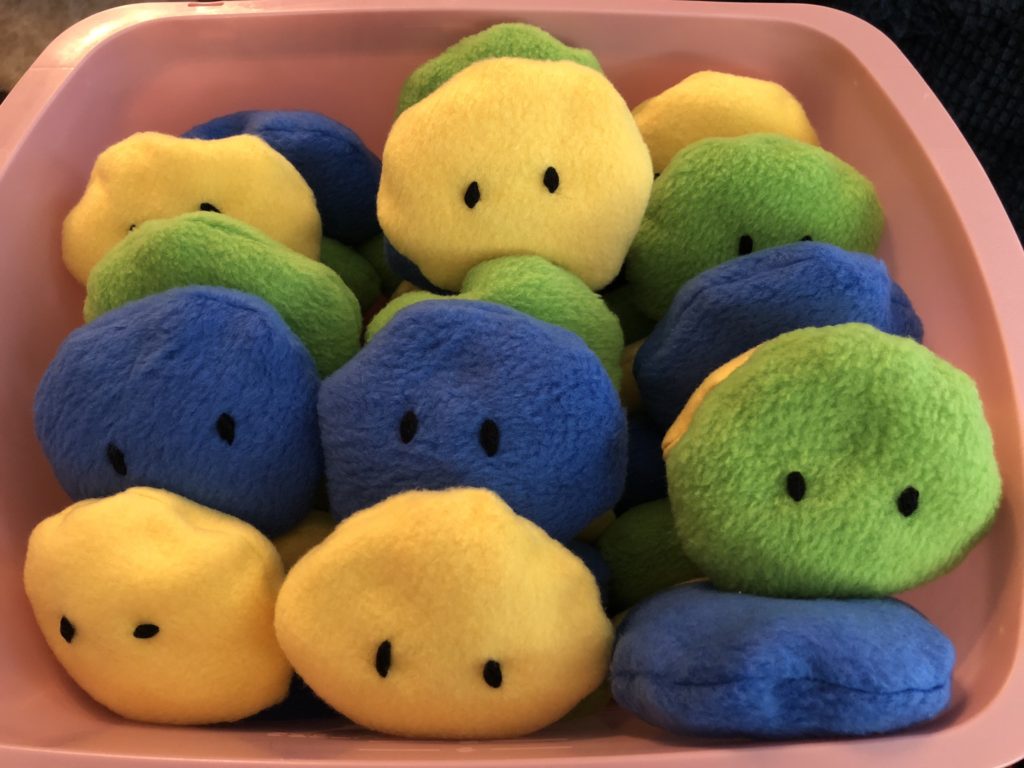
    So I came up with a faster solution. I made bean bags out of polar fleece. I started by tracing 3-4″ circles onto one layer of fleece using a Sharpie. Before sewing two layers together, I used black yarn to embroider eyes. By doing this before sewing, I was able to simply tie the two ends of yarn in a knot to secure. With right sides together, I sewed along the markings, leaving about 2″ unsewn and backstitching at the beginning and end. I trimmed the fleece to about 1/4-1/2″ from the stitching. I turned them right-side out, filled them with poly pellets (not too full), and then hand-sewed them closed. Twenty-six worry pets!

    Here are some other options for knit or crocheted stress balls:

    • Swirl Ball Mystery (knit)–I’ve made this one. It’s an easy 3-color garter stitch ball. It looks neat as an ornament, too.
    • Out of Yarn (knit)–This looks fun, and it’s a good way to use up scraps.
    • Ideal Sphere (crochet)–I’ve used this pattern a few times. You do have to pay attention since the increases and decreases aren’t stacked, but it does make a nice sphere.
    • Puffballs (crochet)–Frankie Brown has so many clever designs.
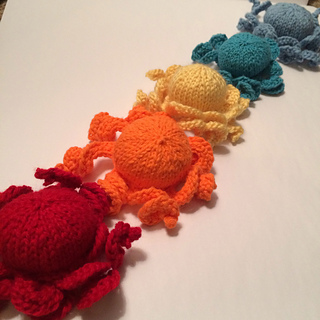
    • Jett the Octopus (knit)–This is my own pattern, so I’ve knit it approximately one million times. Ok, it just seems like it. But I did make 22 of them for my son’s class four years ago. I’m pretty proud of the fact that despite the number of arms, there are only 4 ends to weave in on the entire toy.
    • Any small toy that fits nicely in the palm of your hand.

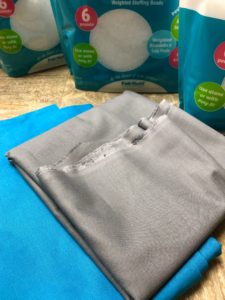
    With the fleece toys, I wasn’t too concerned about the poly pellets escaping. I was just sure to keep my stitches small and tight. Besides, these were being used by third graders; even if the beads did come out, they shouldn’t be putting them in their mouths. But for knit and crocheted toys, I’m always more cautious. I found nylon knee high stockings on closeout a few years ago, so I stocked up just for this purpose. (Small balloons might work, too.) Fill the toe of the stocking with about half the amount of pellets you think you’ll need. (If I’m using a cut end, I tie a knot and then turn the knot to the inside before filling.) Then insert the pouch of pellets into your knit or crocheted toy. Continue filling the stocking with the desired amount. Tie a knot in the top of the stocking and trim. Depending on the size and shape of the toy, you may want to add fiberfill before and/or after adding pellets. Finish the toy as usual.

    If you’d like to knit Jett the Octopus, or any of the other patterns for sale in my Ravelry store, you can take advantage of the Indie Design Giftalong. From now until 11:59 p.m. EST on November 29, you can save 25% with the code giftalong2018

    I normally end my Bronwyn’s Handmade Christmas posts in November, but I do have one more super quick project up my sleeve. I’ll share that in the next couple of weeks. (You know, when I have nothing else to do.) Meanwhile, I wish you happy crafting, happy gifting!

  • Bronwyn’s Handmade Christmas August 2018: Weighted Blankets

    Bronwyn’s Handmade Christmas August 2018: Weighted Blankets

    This month’s handmade gift idea is weighted blankets. Have you heard about these? If you haven’t, imagine a blanket made with a couple hundred bean bags sewn together. It’s not quite the same, but it sort of looks like it.

    So why would someone want a weighted blanket? They are said to be therapeutic for adults and children with autism, ADHD, anxiety, insomnia, restless leg syndrome, and other sensory disorders. A friend with restless leg syndrome swears by her blanket and even travels with it when she can. Hers weighs 16 pounds. It doesn’t feel like 16 pounds when the weight is distributed over your entire body, though. (I’ve traveled with her and have carried her blanket in a tote bag through the hotel. Trust me—it’s 16 pounds.)

    A few months ago, a different friend asked me if I’d ever made one of these blankets. I hadn’t, but it didn’t seem too hard. She wanted this for her daughter who was a freshman in college and dealing with a lot of anxiety at the end of the school year. I was more than glad to help.

    After some discussion, we decided that while a soft minky fabric might be comforting, it might be too warm. We settled on some Robert Kaufman Kona Cotton quilting fabric in two colors—Oasis (a gorgeous teal) and Graphite (a medium gray). I bought two yards of each on Amazon (about $6/yard).

    How much weight? A rule of thumb for how much weight to add is to multiply the individual’s weight by 10% and add 1-2 pounds. My friend’s daughter weighs around 125-130, so we went with 14 pounds. I have a small kitchen scale that weighs to the tenth of a gram, so I converted 14 pounds to 6350 grams. Poly-Fil Poly-Pellets come in various packages, but the best deal I found was on 6-pound bags at Joann.com with a coupon. I bought 18 pounds and added a ball of cotton yarn to bump me up to free shipping. (Be sure to buy the hard plastic pellets like the ones inside Beanie Babies, not the Styrofoam beads for bean bag chairs.)

    I didn’t bother trimming off the selvedges, but I did even up the cut ends. With right sides together, I sewed the two lengths of fabric on three sides, using a ½″ seam allowance. I then turned it right-side out and pressed it.

    How many squares? To make things easier on myself, I made the squares the same width as my quilting ruler—3.5”. I divided the width and length (each) by 3.5 to determine the number of pouches. This gave me 12 columns by 20 rows—a total of 240 squares. Doing the math—6350 grams divided by 240 pouches—that’s about 26.5 grams of pellets per square.

    I couldn’t find my marking pen, so I used a sliver of soap to draw my lines. Some of the lines got smudged away as I handled the project, so I did have to re-draw them occasionally. The soap worked in a pinch, though.

    Next, I sewed the long columns. This made twelve 6-foot-long tubes, essentially. I weighed out 26.5 grams per tube and shook them to the bottom. (See Tip #2 below.) This was trickier than I expected because the pellets are imperfect with little burrs that catch on the fabric. Once all twelve columns were filled for a row, I placed a row of pins to keep the pellets from sneaking into my seam line and sewed across the width. Twelve more pouches…sew across. After a few rows, I didn’t worry so much about getting every single pellet in its proper square.

    Note how I pinned the fabric to keep the pellets from creeping into my seam line.

    I continued weighing, filling, pinning, and sewing until I got to the final row. I pinned the last row as usual. I tucked the raw edges under and pinned again. I sewed straight across the end.

    Tip #1: Set up your sewing machine on a long table so you can spread the blanket out while you sew. I normally use my sewing machine on an old computer desk. After sewing a few rows, the blanket started to get heavy and unwieldy. When I moved everything to a longer table, the sewing sped up considerably.

    Tip #2: Fill the upper portion of the columns near the openings and wait to shake the pellets down all the columns together. You’ll be able to tell which column you’re on, and you won’t accidentally miss one or fill one twice.

    Bonus Tip: Sewing this blanket can be a surprisingly great workout! My weighing station was on my ironing board, but I was filling and pinning the blanket on the floor. That means I did roughly 250 squats over the course of 24 hours! Add to that, schlepping a heavier and heavier blanket back and forth. I don’t necessarily recommend this workout, but it gave me a great story.

    This project costs quite a bit more than my typical Handmade Christmas ideas, about $66 total per blanket. (Shop around and/or wait for good coupons.) If you plan to make several, you might get a better bulk discount on the pellets. This is obviously a special gift you’d make for someone who could really benefit from it, not one to give to all your neighbors and cousins and fringe friends. But this could be the best gift ever for a very lucky person in your life.


    Weighted Blanket

    Finished Measurements: Approximately 43” x 71”

    Materials

    Cotton quilting fabric in 2 colors—44-45” wide, 2 yards of each

    Poly-Fil Poly-Pellets—about 10% of body weight plus 1-2 pounds

    Kitchen scale

    Marking pen, quilting ruler, scissors, pins

    Sewing thread—2 spools

    Paper cups for weighing and pouring pellets into blanket

    Instructions

    Press fabric. If necessary, trim fabric to square up the ends. Place right sides together.

    Using 1/2” seam allowance, sew together along one short and two long edges.

    Turn right-side out and press.

    Mark lengthwise lines for columns. Sew along these lines.

    Mark perpendicular lines for rows, but do not sew yet.

    Weigh Poly-Pellets for each square. (See above for calculations.) Pour pellets into each column. Once all columns have been filled, lift blanket and shake pellets to bottom. Pin and sew across row. The squares will not be firmly filled, so don’t worry if they look droopy.

    Continue filling one row at a time until all squares have been filled. Pin last row to keep pellets from escaping. Turn both edges to the inside and sew across top of blanket, close to the edge.

    Trim any remaining threads and wash blanket to remove pen marks.